

Achieving a Sparkling Home: Tenants' End of Tenancy Cleaning Guide
Posted on 28/09/2025
Achieving a Sparkling Home: Tenants' End of Tenancy Cleaning Guide
Are you preparing to move out of your rental property and want to make a lasting impression on your landlord? End of tenancy cleaning is not just a necessity--it's your ticket to getting that all-important security deposit back. In this detailed and comprehensive guide, we break down everything you need to know to achieve a sparkling home and excel at your final inspection. Whether you're an experienced renter or facing the daunting task for the first time, our tenants' end of lease cleaning guide covers all the steps, tricks, and insider knowledge you need.

Why End of Tenancy Cleaning Matters
End of lease cleaning is crucial for several reasons. When a lease ends, landlords expect the property to be returned in the same condition as when you first moved in. This doesn't just reflect respect and responsibility but is also a requirement detailed in most tenancy agreements. Failing to deliver a thoroughly cleaned property may result in deductions from your deposit or even disputes.
- Maximize your deposit return
- Maintain a good relationship with your landlord or letting agency
- Fulfill legal obligations as a tenant
- Leave a positive impression for references
Pre-Cleaning Checklist: Prepare for Success
Before diving into the deep clean, a bit of organization goes a long way. Use this checklist to set yourself up for an efficient and successful cleaning day.
- Review your tenancy agreement and inventory list: Note any special cleaning requirements or areas highlighted in your initial inspection report.
- Take photos before and after cleaning: This protects you if any disputes arise.
- Arrange for enough time: Plan for at least a full day, or more for larger properties.
- Purchase cleaning supplies: Stock up on multipurpose cleaners, disinfectant, bleach, microfiber cloths, sponges, vacuum bags, trash bags, mop, bucket, and gloves.
- Organize moving logistics: Remove all personal belongings before you begin cleaning to access all surfaces and hidden areas.
- Sort rubbish and donations: Properly dispose of unwanted items or take them to a local charity.
Room-by-Room End of Tenancy Cleaning Guide
1. Kitchen: The Heart of End of Lease Cleaning
*The kitchen often requires the most effort and attention.* From greasy splatters to hidden crumbs, a spotless kitchen will impress any landlord. Focus on these tasks:
- Clean all appliances inside and out: Oven, stove tops, microwave, fridge, freezer, dishwasher, and washing machine. Don't forget to pull out appliances to clean behind and below!
- Defrost and clean the fridge and freezer: Leave the doors open to prevent mold after cleaning.
- Scrub kitchen cabinets: Empty, wipe down inside and outside, including tops and handles.
- Disinfect countertops, backsplash, and sink.
- Polish taps and remove lime scale.
- Empty and sanitize trash bins.
- Mop and vacuum floors.
2. Bathroom: Gleaming and Hygienic
A sparkling bathroom demonstrates attention to detail and proper hygiene. Make sure you:
- Descale showers, bathtubs, taps, and tiles. Don't overlook shower heads and grout lines.
- Polish mirrors and fixtures.
- Scrub sinks, toilets, and bidets. Don't forget under the rim!
- Clean and disinfect soap dishes and holders.
- Wipe down or wash shower curtains. If you have a glass screen, remove stubborn water stains.
- Empty bins and replace liners.
- Vacuum and mop floors with bathroom-safe cleaner.
3. Living Room and Bedrooms: Creating a Tidy Oasis
Focus on making these areas look inviting and well-presented:
- Dust and wipe all surfaces and furniture, including behind and under items.
- Clean light fixtures, lampshades, and ceiling fans.
- Vacuum carpets, rugs, and mop hard floors.
- Spot-treat stains on carpets and upholstery.
- Empty and clean wardrobes, drawers, and shelves.
- Wipe doors, handles, and switch plates.
- Launder or shake out curtains and blinds.
4. Hallways, Entrances, and Stairs
*These high-traffic areas collect dust and grime--don't ignore them!*
- Clean banisters, handrails, and balusters.
- Vacuum and spot-clean carpets or mop hard flooring.
- Dust skirting boards and wipe light switches.
- Clear out mail slots and coat closets.
5. Windows and Outdoor Spaces
*First impressions count! Bright, clean windows and tidy outdoor areas set the right tone for your final inspection.*
- Wash windows, sills, and frames inside and out (if accessible and safe).
- Remove cobwebs from corners and ceilings.
- Sweep patios, balconies, or garden paths.
- Tidy up outdoor bins and ensure external doors are clean.
Expert Tips for a Successful End of Lease Clean
1. Create a Cleaning Plan and Checklist
A structured task list will keep you on track and ensure you don't miss any details. Break down chores by room and tick off as you go.
2. Gather Quality Supplies
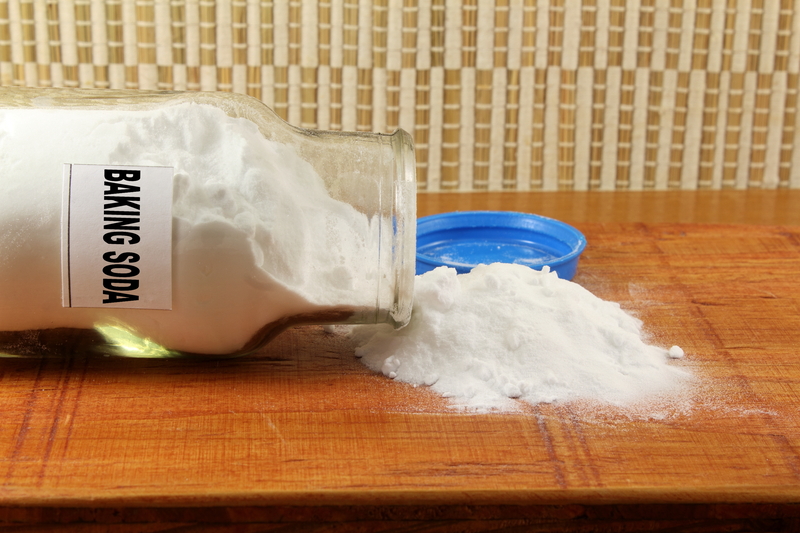
Invest in quality cleaning products and tools. Microfiber cloths, white vinegar, baking soda, and strong disinfectants will deliver better results with less effort. Don't forget to use gloves and proper ventilation!
3. Address Stubborn Stains and Problem Areas
Have pets or children? Pay special attention to odours, stains, or pet hair. Use enzyme cleaners for organic stains and spot treatments on soft furnishings.
4. Don't Forget Hidden and Overlooked Spots
- Behind and under furniture and appliances
- Vent covers and extractor fans
- Inside cupboards and drawers
- Window and door tracks
- Light switch plates and door handles
- Heater vents and radiators
5. Enlist Help if Needed
*Feeling overwhelmed? Many tenants choose to hire a professional end of tenancy cleaning service. While it costs more, this option provides peace of mind and typically comes with a guarantee. Always check your tenancy agreement, as some agencies specify professional cleaning upon departure.*
Checklist: End of Tenancy Cleaning Essentials
- All rooms: Dust, vacuum, and mop everywhere, including up high and in tight spots
- Appliances: Clean inside and outside, defrost, and remove lint from washers/dryers
- Kitchens: Polish all chrome, de-grease tiles, and thoroughly clean sink and worktops
- Bathrooms: Descale, disinfect, and polish all fixtures
- Windows: Clean inside and out, wipe ledges and frames
- Furnishings: Dust, spot-clean, or wash where appropriate
- Carpets: Vacuum thoroughly, spot-treat stains, and consider professional steam cleaning if required
- Rubbish: Remove all trash and personal belongings
Common End of Tenancy Cleaning Mistakes to Avoid
- Skipping the oven and appliances: These are high on most checklists and a common cause of deposit disputes.
- Ignoring limescale and water stains: Taps, showerheads, and glass surfaces can easily build up stubborn marks.
- Missing dust traps: Skirting boards, blinds, lamp shades, and extractor fans attract dust and are often overlooked.
- Forgetting to wash walls and doors: Scuff marks and fingerprints stand out during inspections.
- Leaving behind personal items or rubbish: Ensure every drawer, cupboard, and nook is empty and clean.
- Failing to replace broken bulbs or batteries: Light fixtures should be working unless otherwise noted in your check-in report.
- Incomplete carpet and upholstery cleaning: If required by your lease, hire professional cleaners to provide proof of deep cleaning.
Professional End of Tenancy Cleaning: Is It Worth It?
While a DIY end of tenancy clean is achievable for most, there are circumstances where hiring professionals is the smart move, such as:
- Short notice moves
- Large or furnished properties
- Difficult stains or odours
- Required professional cleaning in your rental contract
- Lack of cleaning supplies or help
Professional end of lease cleaning services provide a detailed clean, often backed by a receipt and satisfaction guarantee. This can smooth out the return-of-deposit process--just ensure you book with a reputable, insured provider.
Final Steps: Preparing for Your Checkout Inspection
Once your cleaning is finished, don't forget:
- Do a final walk-through: Compare each room against your check-in inventory/photos.
- Open windows to air out the home: This eliminates lingering odours and freshens the space.
- Leave keys and instructions in their agreed location.
- Take dated, detailed photos as proof of cleanliness before handing in your keys.
- Communicate with your landlord or letting agent if there were any damages or unresolved issues.
Frequently Asked Questions About End of Tenancy Cleaning
Do I Have to Hire a Professional Cleaner?
Not always. If your tenancy agreement doesn't mandate it, a thorough DIY clean is acceptable--so long as it matches professional standards. Always read your contract carefully.
How Long Does End of Lease Cleaning Take?
It can take several hours to a full day or more, depending on property size and condition. Plan accordingly!
What if My Landlord Isn't Satisfied?
If your landlord raises concerns, review any cleaning checklists and inspection reports. Having before-and-after photos helps. If professional cleaning is needed, you may be able to negotiate or hire cleaners to address specific areas.
Who Pays for End of Tenancy Cleaning?
The tenant is typically responsible for returning the property in good condition. Unresolved cleaning can lead to deposit deductions.
Conclusion: Achieve a Sparkling Home and Get Your Deposit Back
End of tenancy cleaning is a vital step when moving out of a rental. By following this comprehensive end of tenancy cleaning guide, you'll leave your property spotless, avoid deposit deductions, and move on stress-free. Whether you tackle the clean yourself or enlist professional help, remember: *attention to detail, a thorough checklist, and a dose of elbow grease are your best tools for success*. Happy moving--and enjoy your sparkling clean home!
Related searches: end of tenancy cleaning checklist, spring cleaning for renters, moving out cleaning tips, deposit refund cleaning, tenancy move out cleaning advice.